How to Prepare a Trial Exhibit Binder Notebook
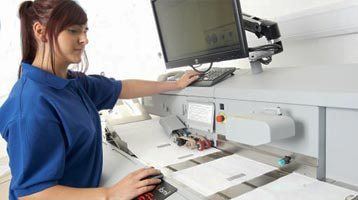
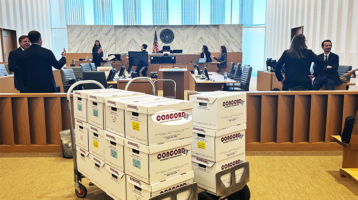
Your trial notebook is your blueprint of your case and your road map for trial. Many firms begin by collecting & printing in house. Because of the expense involved while negotiating a settlement, most firms do not prepare until just before trial starts. If you’re in a crunch, you can call CONCORD to help facilitate overnight printing & delivery to the courthouse.
CONCORD can help you with last minute printing. We can handle large trial exhibit binder productions overnight & deliver to the courthouse, or ship via FedEx to your office or courtroom. Call (213) 745-3175 or email sales@concorddt.com .
You should begin preparing your trial notebook from the very beginning of your case. If you’re on the plaintiff’s side, this means you’ll start preparing your trial notebook before you even file your petition or complaint. And if you’re on the defense side, you should start putting together your trial notebook as soon as you receive a copy of the petition or complaint.
Your ultimate goal in preparing this trial notebook is to have every relevant part of your case organized and crafted into the story you plan to present a judge or jury at trial.

Requirements vary by jurisdiction and individual judge, but the process below covers the standards used in most California superior courts (including Stanley Mosk / Los Angeles Superior Court) and many other state and federal courts.
1. Confirm the Exact Requirements First
- Check your court’s local rules and the assigned judge’s trial preparation order or courtroom procedures.
- In Los Angeles Superior Court (Stanley Mosk), key rules are Local Rules 3.52 and 3.53, plus the department’s specific Trial Preparation Order.
- Ask about: number of sets required, binder size limits, labeling format, internal pagination style, and whether yellow evidence tags are needed.
2. Pre-Mark and Organize the Exhibits
- Exchange all non-impeachment exhibits with the other side well before the Final Status Conference (FSC) or trial.
- Number them using the court’s preferred system (usually sequential Arabic numbers allocated in blocks by party — e.g., Plaintiff 1–200, Defendant 201–400).
- Create a Joint Exhibit List with columns such as:
- Exhibit number
- Brief description
- Offering party
- Stipulation to authenticity
- Stipulation to admissibility
- Objections (if any)
- Date marked / Date admitted (left blank for the clerk)
3. Prepare the Physical Binders
Standard contents of each binder:
- Front cover + spine labels with case name, case number, and “Exhibit Binder” (add volume number if multiple binders, e.g., “Exhibit Binder 1 of 3 – Exhibits 1–45”).
- Conformed copy of the Joint Exhibit List as the first item.
- Tabbed exhibits in numerical order (tabs on the right side).
- One-sided copies only for documentary exhibits.
- Multi-page exhibits internally paginated (e.g., 12-1, 12-2, 12-3 or 12.1, 12.2, 12.3).
- Only one set of page numbers visible — cover or remove conflicting Bates numbers or deposition exhibit stamps.
- For non-documentary items (photos, objects, etc.), place a short written description behind the tab.
How many identical sets? Most departments require at least three:
- Judge / Court
- Judicial Assistant / Clerk
- Witness stand
You will also need working sets for each counsel table. Some departments want four court sets. Confirm the exact number.
4. Practical Assembly Tips
- Use sturdy 3-ring binders (often limited to about 3 inches; split large volumes).
- Make tabs clear and durable so they can be flipped quickly under pressure.
- Keep volumes reasonable — do not put a 500-page file as one exhibit if only a few pages will be used.
- Place court-supplied yellow evidence tags (case number + exhibit number) on the Judicial Assistant’s set when required.
- Bring one complete set to the Final Status Conference for the court to inspect.
5. Timing Checklist
- Exchange exhibits early.
- Meet and confer on authenticity, foundation, and admissibility.
- Finalize and file the Joint Exhibit List (often due 5 days before FSC).
- Assemble the binders.
- Deliver the required sets on the first day of trial (or as ordered).
Quick Quality Control Before Court
- Every multi-page exhibit is internally numbered.
- Tabs match the exhibit list exactly.
- All sets are identical.
- Labels are clear on both front and spine.
- No stapled documents inside the binders (unless the court allows it).
- Extra empty binders/tabs available for admitted exhibits if the department prefers a separate “admitted” set.
What sections to I need in my trial binder?
The layout and content of your trial binder is ultimately up to you. One of the first steps is to develop a theme for your side of the case. Your theme is the central story that you want a judge or jury to hear. You will develop that theme with evidence and witnesses as your case progresses through investigation and discovery. If your state has pattern jury charges, these can be an excellent resource in helping you know what issues need to be addressed and what ultimately must be proven at trial.
An associate or paralegal can help you gather the material you plan to use at trial. Generally, you will want to include the following:
- A pleadings section containing copies of all complaints/petitions and answers that have been filed in the matter. Placing these items in reverse chronological order will help you keep the most pertinent material in the front. You may even include any motions in limine and other motions you plan to argue at trial, as well as outlines of the arguments you plan to make.
- Copies of any investigative materials that are central to the case. If this may be too voluminous (as can be the case in matters with substantial medical records), you can include copies of key materials and summaries of the voluminous material. Or you can create multiple binders.
- Witness lists (including contact information) as well as copies of witness statements and deposition testimony that may come up at trial.
- Copies of all documents you intend to introduce at trial or that may be used as rebuttal evidence. As noted above, if this is too voluminous for your trial notebook, you might include summaries containing exhibit numbers instead. At the very least, include a copy of your exhibit list with columns for (1) the exhibit number, (2) a description of the exhibit, and (3) whether the exhibit is admitted or rejected.
- Legal authorities, including statutes and case law that is relevant to your case. You should have a grasp of the important law early in the case. Include copies of any case law, statutes, and regulations that help guide one to the answer of the legal issue(s) in your case.
- Copies of major motions and court orders, including any scheduling order.
- A timeline for the case that outlines the dates (and, if necessary, times) that significant facts occured.
Here are a few other ideas of sections that might go into your trial notebook:
- Trial Team Contact Information
- Initial Case Assessment/Evaluation
- Proof Outline
- Damages Outline
- Pleadings
- Investigation Materials
- Witness Statements
- Witness Outlines
- Discovery
- Deposition Transcripts/Designations
- Discovery Motions
- Motions
- Case Law
- Statement of Facts
- Exhibit List
- Objections to Exhibits
- Direct Examination Outlines
- Cross Examination Outlines
- Deposition Index and Outlines
- Opening and Closing Statement Outlines
- Voir Dire Outline
- Jury Charge
- Trial Briefs
- Pre-Trial Motions
- Trial Motions
- Post-Trial Motions
If you utilize your trial notebook wisely, your case might even settle beforehand because your opponent can see that you are prepared to try the case.